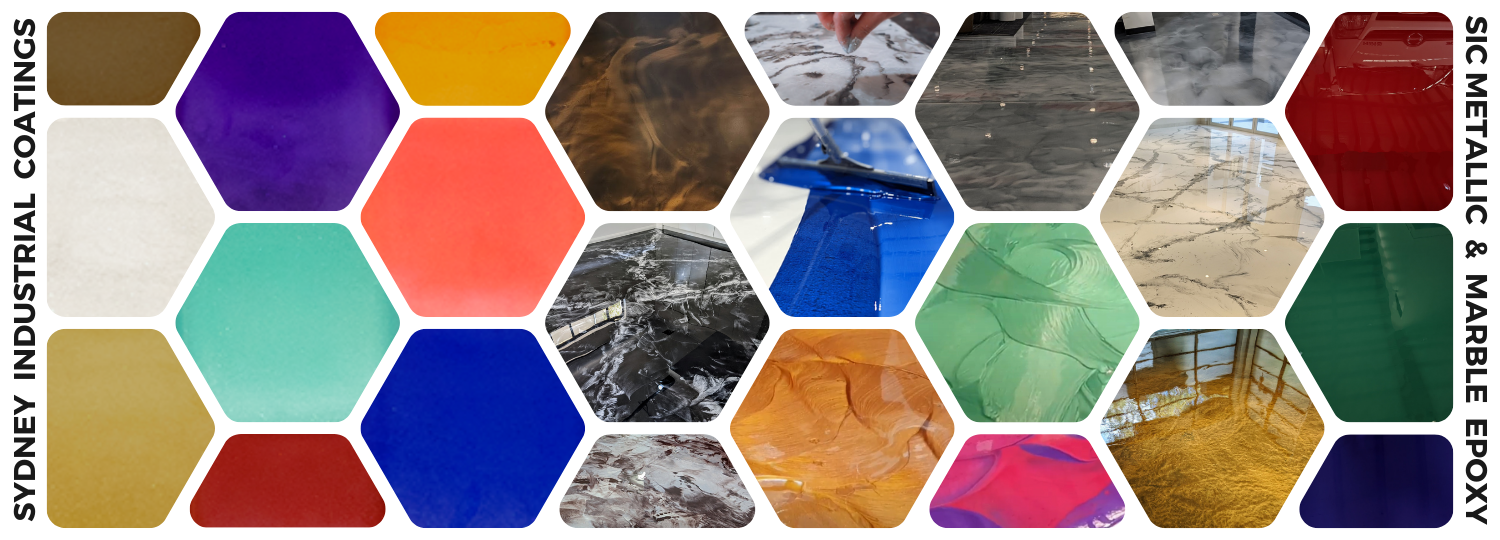
Steps to achieving a successful Metallic and Liquid Epoxy Marble Floor Coating System
Prepare the substrate thoroughly by diamond grinding or acid etching
To achieve a successful floor coating system make sure your surface is free of dust, oil/grease, any loose particles or paint and moisture. If your floor is subject to rising dampness, you would need to apply a moisture barrier primer prior to applying your base coat. | more info
Repair cracks and imperfections using two-pack epoxy fillers
Fill in all your cracks using a 2-pack epoxy filler, such as Sikadur 31 CFN. For larger cracks and spalls, use Sydney Industrial Coatings’ Epoxy Coving and Repair Kit. The patching mortar will need to be fully cured before it can be grinded or coated and this process usually takes a minimum of 6 – 8 hours.
Apply epoxy primer to the floor and allow the coating to cure
General curing time (at 20°C) is a minimum of 8 hours. This can vary further if solvent has been added to the epoxy.
Return within 24 hours of applying the primer to remove rubbish and imperfections (by grinding down high sections and patching any low sections)
This is an important step for if the coating is left uneven, this will show though your final coat. If this step if not completed within 30 – 36 hours (depending on temperature) of applying the previous coat, the floor will need to be scratched using an 80 grit sand paper. NOTE: The floor must be completely even and free from ANY imperfections before proceeding to the next step.
Apply an even coat of the coloured epoxy, by rolling the product from wall to wall, and allow to cure General curing time (at 20°C) is minimum 8 hours. It is always recommended to back roll the product against the natural light to assist with achieving a more uniform finish. Wearing spike shoes to walk over the epoxy can help ensure the product is applied evenly, however you must apply safety practices and be cautious of injury.
Return to begin your Metallic or Marble coat Mixing and application will be the same as above however with a 100% solids, self-level product! Metallic Epoxy Floor: Into Part A of the clear epoxy you will add the metallic pigment of choice and power mix until the powder has dissolved completely – You can mix your metallic pigment in the part a the night before to help with the saturation and mix of the powder. Once the pigment have dissolved, add your Part B, power mix for 2 minutes and apply to the floor to swirl or squeegee for the effect desired. Liquid Epoxy Marble: Into Part A mix a solid colour pigment as you would for your base coat. Make sure you do the same for the second batch which will be the secondary colour of your choosing. The size of the second batch will depend on preference and part B should only be mixed when ready to apply straight to the floor. NOTE: It is always best to have one person complete the mixing and pouring the another to actually completed and move/swirl the design.
Return the next day and apply one to two clear top coats to achieve optimum results when sealing the floor coating system
General curing time (at 20°C) is minimum 8 hours for each coat of clear. Depending on the top coat being used, ensure correct amount of product is applied to the floor | If the floor is subject to heavy solvent, fuel or chemical spillage consider applying a two-pack clear top coat instead of a single pack.